How to generate and use Custom Root Certificates on Proxyman?
This mini-blog will guide you on how to manually generate self-signed certificates that comply with new Apple’s Security Requirement (iOS 13+ and Catalina), then using it as a Custom Root Certificate.
1. What is new Apple's security requirement?
From iOS 13 and macOS 10.15 (Catalina), all certificate must comply with new Apple security requirements in order to work properly.
To summary,
- RSA Key must have key size is greater than 2048 bits
- Hash algorithm is SHA-2 family
- SHA-1 signed certificates are no longer trusted for TLS.
- DNS Name of the server must present on Subject Alternative Name. Common Name is no longer trusted
- Valid certificate (Current day is in Not Before and Not After)
- Validity period is 825 days or fewer
- TLS server certificates must contain an ExtendedKeyUsage (EKU) extension containing the id-kp-serverAuth OID.
Read more at: https://support.apple.com/en-us/HT210176
2. How to generate self-signed certificate?
1/ Prepare cert.config file on Desktop Folder
[ ca ]
default_ca    = CA_default
[ CA_default ]
default_md    = sha256
[ v3_ca ]
subjectKeyIdentifier=hash
authorityKeyIdentifier=keyid:always,issuer
basicConstraints = critical,CA:true
keyUsage=critical,keyCertSign
extendedKeyUsage = serverAuth,clientAuth
[ req ]
prompt = no
distinguishedname    = reqdistinguished_name
[ reqdistinguishedname ]
C=US
L=US
O=Self-signed Certificate
CN=my.server.dev
OU=Self-signed Certificate
- Please update values for C, L, O, CN, and OU param.
2/ Generate RSA Key in the Terminal app. (Make sure you replace your_password to your real password)
cd ~/Desktop
openssl genrsa -aes256 -passout pass:your_password -out key.pem 2048
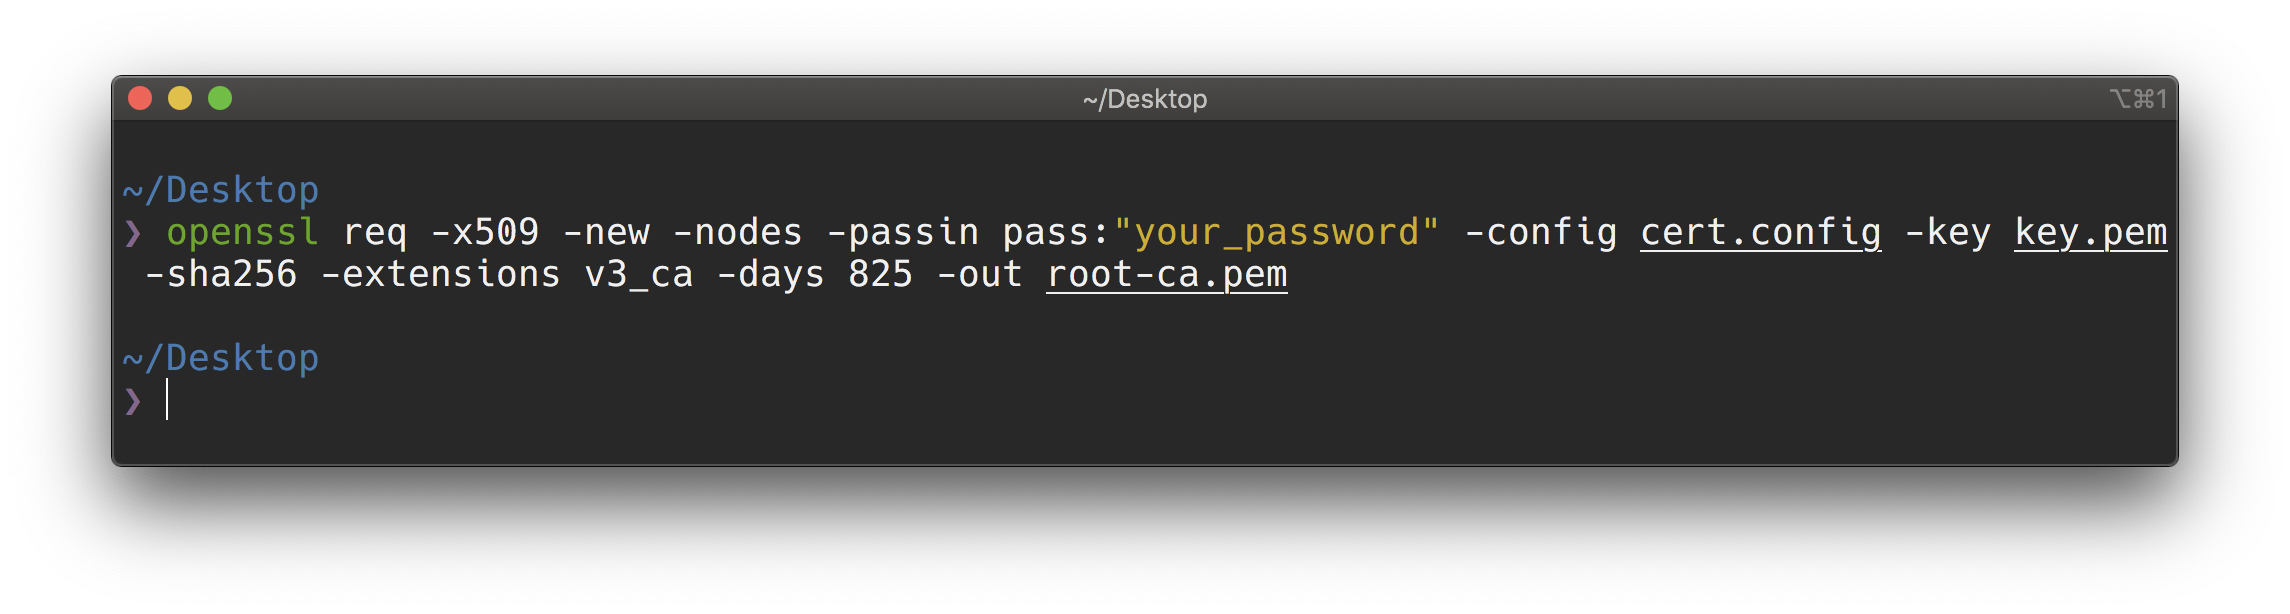
3/ Generate the self-signed certificate and private key. (Make sure you replace your_password to your real password)
openssl req -x509 -new -nodes -passin pass:your_password -config cert.config -key key.pem -sha256 -extensions v3_ca -days 825 -out root-ca.pem
4/ Convert to p12 format. (Make sure you replace your_password to your real password)
openssl pkcs12 -export -out root-ca.p12 -in root-ca.pem -inkey key.pem -passin pass:your_password -passout pass:your_password
5/ Finally, you would have root-ca.p12 file and move to the next step
3. Use as Custom Server Certificate in Proxyman
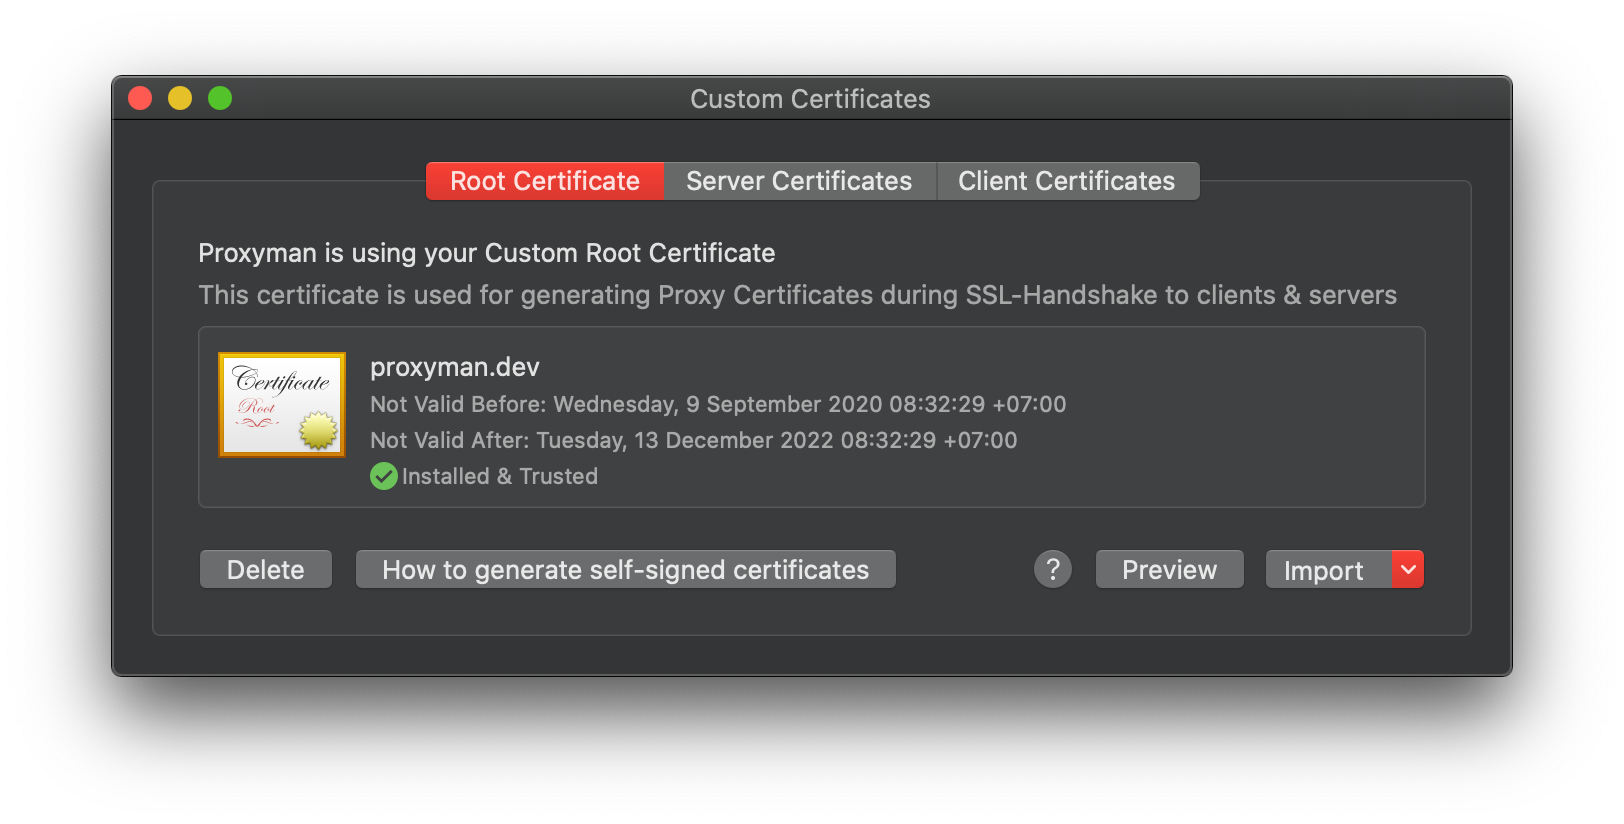
- Go to Certificate Menu -> Custom Certificate -> Select Root Certificate Tab
- Click Import button -> P12
- Select root-ca.p12 and enter the password
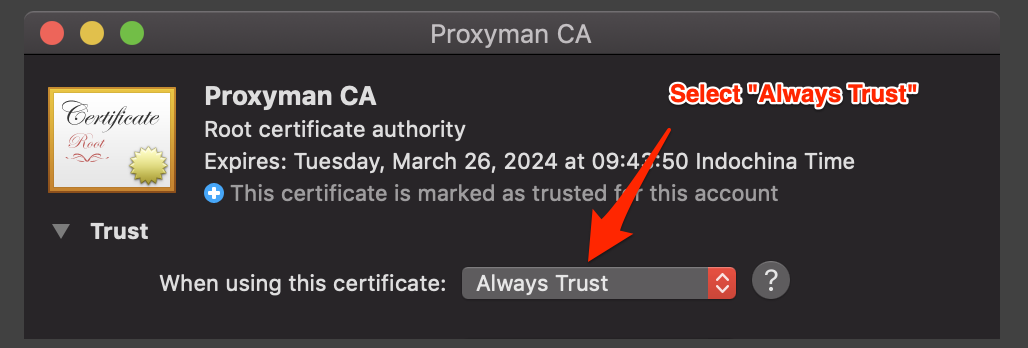
- Trust your custom certificate in Keychain App:
- Open Keychain App
- Search for the certificate you've added. The name might be the common name (CN) of the certificate
- Double Click to open and select Always Trust
- Click "X" and save the change
Please verify that you can see the Green Tick that shows the certificate is installed and trusted properly
Please check out the Custom Certificate Document.
Proxyman is a high-performance macOS app, which enables developers to capture HTTP/HTTPS requests from apps and domains on iOS device, iOS Simulator and Android devices.
Get it at https://proxyman.io